
How to set up a security system that actually works
TL;DR:
- Proper security setup requires a thorough property assessment to identify vulnerabilities and prevent blind spots.
- Configuring, testing, and maintaining the system regularly ensures reliable protection that functions when most needed.
Most homeowners assume their security system covers them. Then a break-in happens through the side door that was never monitored, or a motion sensor triggers every time a car drives past. Setting up a security system correctly means far more than mounting a camera above the front door and calling it done. A systematic, evidence-backed workflow eliminates blind spots, cuts false alarms, and gives you a setup that performs when it counts. This guide walks you through every stage, from property assessment to long-term maintenance, so you can build protection you actually trust.
Table of Contents
- Assessing your security needs and choosing the right system
- Gathering tools and planning installation
- Installing sensors, cameras, and control panels
- Configuring, testing, and verifying your system
- Maintaining security system reliability
- Our take: Why “plug-and-play” is rarely enough—hard-won lessons from real installs
- Find solutions tailored to your security needs
- Frequently asked questions
Key Takeaways
| Point | Details |
|---|---|
| Start with assessment | Identify key entry points and vulnerable spots before choosing your system. |
| Coverage and placement matter | Install sensors and cameras strategically for perimeter and approach coverage. |
| Test and verify thoroughly | Always test device triggers and app alerts in real-world conditions to avoid gaps. |
| Maintain for reliability | Follow a regular maintenance schedule, including testing, updates, and access reviews. |
Assessing your security needs and choosing the right system
Now that you know what’s at stake, let’s start with the first crucial step: understanding and defining your property’s security needs.
Before you spend a dollar on hardware, walk your property with fresh eyes. Pretend you’re looking for a way in. Examine every exterior door, including side and garage doors that people tend to overlook. Check ground-floor and basement windows. Identify where high-value items are stored, whether that’s a home office with expensive equipment, a retail stockroom, or a garage filled with tools. Note any areas with poor lighting or natural concealment like dense shrubs or recessed entryways.
Key vulnerabilities to document:
- All exterior doors, including secondary and rear access points
- Ground-level and easily accessible windows
- Detached garages, outbuildings, and storage areas
- Areas with limited natural visibility from the street
- Interior zones housing valuables, servers, or cash
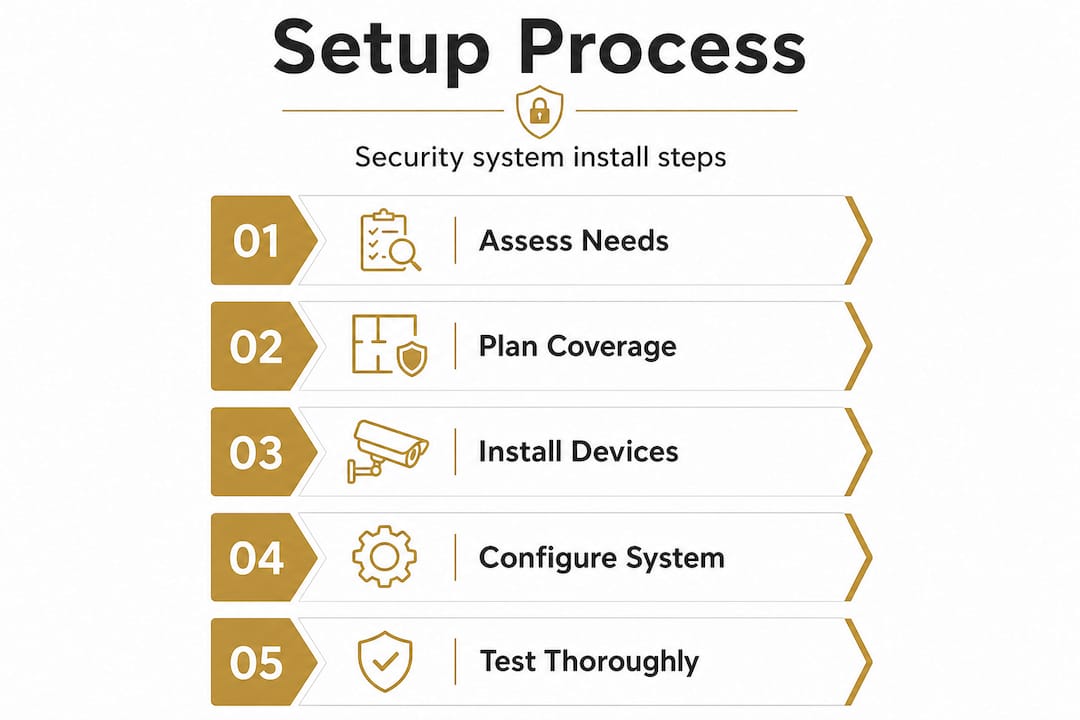
Once you’ve mapped your property’s risks, cross-reference it with a solid security checklist to ensure nothing gets skipped. A practical step-by-step setup workflow covers: assess needs and entry points, choose compatible devices or a single ecosystem, prepare placement and network plans, install all hardware, configure and integrate with your app, then test and verify end-to-end.
DIY vs. professional installation: which path fits you?
| Factor | DIY installation | Professional installation |
|---|---|---|
| Upfront cost | Lower | Higher |
| Time investment | Significant (your time) | Minimal (your time) |
| Customization | High | High |
| Technical skill needed | Moderate | None required |
| Ongoing support | Self-managed | Often included |
| Accountability | Yourself | The installer |
Pros and DIY options both have real trade-offs: professionals handle assessment, secure mounting, configuration, testing, and training, while DIY paths put all of that responsibility on you. For simpler setups, DIY works well. For larger properties or more complex layouts, professional guidance closes the gap.
When selecting devices, prioritize ecosystem compatibility. A camera from one brand that won’t communicate with your alarm panel from another creates management headaches and potential coverage gaps. Understand the security features that matter most for your situation before committing to any product line.
Pro Tip: Sketch a rough floor plan and mark every planned device location before buying anything. You’ll spot coverage overlaps and blind spots on paper rather than after you’ve already drilled holes in your walls.
Gathering tools and planning installation
Once you’ve chosen your system and mapped your priorities, it’s time to prepare thoroughly for installation.
Arriving at an install with the wrong tools wastes an entire afternoon. More critically, poor network planning can leave devices struggling to connect or dropping offline during the moments that matter most.
Tools and materials checklist:
- Power drill with masonry and wood bits
- Screwdrivers (flathead and Phillips, multiple sizes)
- Ladder appropriate for your ceiling and roof heights
- Cable clips and conduit for routing wires neatly
- Fish tape (for running cables through walls)
- Voltage tester if working near electrical panels
- Wi-Fi router login credentials and network details
- Smartphone with system app pre-downloaded and account created
- Backup batteries for sensors and control panel
- Mounting hardware included with devices, plus spares
Check your Wi-Fi signal strength at every planned device location before installation. A camera that shows three bars at your desk might have nearly no signal in the corner of your garage. Dead zones are a common cause of unreliable coverage that most people only discover after the fact. Use a Wi-Fi analyzer app on your phone and walk the property.
Standard DIY setup steps include: testing devices per the manual, adding and naming each component in the system account, connecting the main panel to your home Wi-Fi, installing companion apps on all user phones, then placing cameras and motion sensors in critical areas while also installing door, window, and glass-break sensors.

For DIY surveillance tips that go beyond the basics, including mounting height recommendations and optimal angles, it’s worth reviewing practical field-tested guidance before you begin.
One factor most installation guides skip: plan for internet outages. If your system relies entirely on Wi-Fi, a router reboot, ISP outage, or targeted interference will leave you unprotected. Cellular backup or a hardwired ethernet connection for your panel adds a critical layer of resilience that purely wireless setups lack.
Pro Tip: Have backup batteries installed and cellular failover configured before you wrap up the install. Don’t leave it as a “I’ll do that later” task. That failover may be the thing that catches a burglary during a power outage.
Installing sensors, cameras, and control panels
With your tools ready and plans set, you’re now ready to bring your security system online, one device at a time.
Physical installation is where most mistakes happen. Rushing through mounting, ignoring angles, or placing sensors in the wrong spot creates vulnerabilities that look fine on the surface but fail in real conditions.
Numbered installation sequence:
- Install the control panel first in a central, discreet location near a power outlet and ethernet port if available.
- Mount door and window contact sensors on all exterior access points before moving to interior devices.
- Install glass-break sensors in rooms with large window surfaces, typically 15 to 25 feet range per sensor.
- Position motion detectors in interior zones covering likely movement paths such as hallways, stairwells, and room entrances.
- Mount cameras at entry points, driveways, and any exterior blind spots identified in your initial assessment.
- Verify all wiring is neatly routed, anchored, and not a tripping hazard or visible temptation for tampering.
- Power on devices one at a time and confirm each connects to the panel or app before moving to the next.
Proper placement for perimeter coverage means using contact sensors on exterior doors and accessible windows, and positioning motion detectors to cover likely approach paths, not just the doorway itself. A sensor mounted directly above a door only triggers when someone is already inside. A sensor covering the hallway or approach corridor gives you earlier warning and more response time.
Mount motion detectors along the paths an intruder would travel to reach interior rooms, not just at entry points. Catching movement in a hallway or stairwell gives you critical extra seconds to respond.
Camera placement deserves extra care. Coverage gaps and poor camera angles are among the most common reasons security systems fail to capture usable footage during real events. Glare from afternoon sun, blown-out highlights at night, or cameras aimed too wide to identify faces are all avoidable with a bit of planning.
For detailed wiring and mounting specifics, the camera wiring guide covers the technical steps clearly. Also review the complete setup workflow to confirm you haven’t skipped a stage.
Pro Tip: Adjust each camera’s angle in daylight, then check the same view at night. Lighting conditions shift dramatically, and an angle that looks perfect at noon might capture nothing but glare after dark.
Configuring, testing, and verifying your system
Once everything is physically installed, the real value emerges when you configure, test, and verify full end-to-end operation.
This stage separates a security system that works from one that just looks like it works. Configuration errors, unnamed devices, and untested sensors are extremely common. Most homeowners never find out until an actual incident reveals the gap.
Configuration and testing steps:
- Open your system app and confirm every device appears as connected. Rename each one by location (e.g., “Back door sensor” or “Garage camera”) so you can act fast in an emergency.
- Set motion sensitivity levels for each detector based on the environment. High-traffic areas may need lower sensitivity to reduce pet or vehicle false triggers.
- Configure notification preferences so critical alerts push immediately to all user phones.
- Enable two-factor authentication on your system account and review which users have app access.
- Walk through each monitored zone one at a time and trigger each sensor deliberately, confirming the alert fires correctly in the app.
- Test the siren and any monitoring center connection, following your provider’s procedure to avoid dispatching emergency services accidentally.
- Simulate a power outage by unplugging the panel and confirm the cellular backup activates as expected.
Standard DIY configuration includes testing per the manual, adding and naming components in the account, and connecting the panel to home Wi-Fi before verifying app functionality on all user devices.
False alarms are a serious problem, not just an annoyance. Verified response protocols allow monitoring centers to confirm an alarm is genuine, often through remote video, before contacting police. This reduces unnecessary emergency dispatch and keeps your relationship with local authorities in good standing. Enable this feature if your monitoring plan supports it.
Visit the alarm system basics resource to understand how monitoring tiers differ and which features best match your setup. For hands-on testing advice beyond the standard manual, the DIY security tips guide covers practical verification methods.
Pro Tip: Don’t just test sensors by waving your hand near them. Simulate realistic events: open the back door slowly, walk the same path an intruder would take, and check whether every alert fires in the correct order and with the right label. Precision in testing reveals precision in coverage.
Maintaining security system reliability
After initial setup, ongoing reliability is essential. Don’t let your system fall out of sync with your actual security needs.
A security system installed in January and never touched again is a system quietly degrading in reliability. Batteries drain. Firmware develops vulnerabilities. Access credentials get shared and forgotten. An annual review isn’t enough.
Monthly and quarterly maintenance tasks:
- Monthly: Trigger each alarm and sensor manually to confirm correct operation
- Monthly: Review recent alert logs for unusual patterns or missed events
- Monthly: Check that all cameras are recording and footage is accessible
- Quarterly: Replace low-battery sensors and test the main panel battery backup
- Quarterly: Verify cellular failover activates correctly when the primary connection drops
- Quarterly: Update device firmware across all cameras, sensors, and the control panel
- Quarterly: Review app user access and revoke credentials for anyone who no longer needs them
- Annually: Physically inspect all mounts, cables, and hardware for weathering or tampering
Reliable maintenance means testing alarms monthly, replacing batteries on schedule, verifying cellular failover quarterly, and keeping firmware current across all devices. The same source highlights that MFA and access-sharing reviews belong in your regular routine because a compromised account can undermine every physical protection you’ve installed.
Reviewing how to maintain security systems gives you a structured schedule you can actually follow without it feeling overwhelming. Tracking the latest security features as technology evolves also helps you spot when an upgrade makes sense rather than continuing to patch an aging system.
Pro Tip: Schedule a recurring quarterly calendar reminder labeled “Security system check.” When it fires, run through the full maintenance list before dismissing it. This single habit prevents the slow drift from “fully operational” to “technically installed.”
Our take: Why “plug-and-play” is rarely enough—hard-won lessons from real installs
Here’s the thing no box promises to tell you: plug-and-play kits are designed for ideal conditions. Real properties aren’t ideal. Walls absorb Wi-Fi. Sun glare washes out camera angles. Sensors positioned according to a generic diagram cover the door but miss the window three feet away. Motion detectors tuned to default sensitivity trigger on passing headlights or a family dog.
What we see repeatedly is that the hardware rarely fails. The placement and configuration does. A homeowner who followed the quick-start guide has a system that technically works but practically has a blind spot covering the most likely entry point on their property. That’s a false sense of security, which is arguably worse than no system at all.
The uncomfortable truth about security systems is that confidence from a bench test doesn’t translate to field performance. You think it works because you pressed the test button and the app beeped. But have you walked the actual approach path an intruder would take at 2 a.m. and checked whether every step triggered the right response? Most people haven’t. And most systems that “failed” weren’t defective—they were set up for the best case and encountered the real case.
Following a proven security setup workflow doesn’t just give you a checklist. It forces you to confront the gaps before someone else does. That methodical mindset, not the price tag on your hardware, is what separates a working security system from a decorative one.
Pro Tip: Before declaring your setup complete, hand your property assessment notes to someone who wasn’t involved in the install. Ask them to walk the property and find a way in. Fresh eyes catch what familiarity misses.
Find solutions tailored to your security needs
Knowing the right process is half the battle. Having the right equipment for your specific property makes the other half work.
At Safes and Security Direct, we offer a wide range of professional-grade security cameras, alarm systems, sensors, and safes designed for homes and businesses of all sizes. Whether you’re building your first setup or replacing aging hardware, our product guides, expert resources, and detailed specifications help you match the right solution to your property’s actual needs. Browse our catalog and take the next step toward security you can genuinely rely on.
Frequently asked questions
What is the first step to setting up a security system?
Assess your property for entry points and vulnerabilities, then select devices compatible with your needs and environment. A proven setup workflow begins with this assessment before any hardware is purchased or installed.
Where should sensors and cameras be placed for maximum coverage?
Install sensors on all external doors and accessible windows, and position motion detectors and cameras to cover approach paths and critical areas, avoiding blind spots. Proper perimeter placement uses contact sensors at entry points and motion detectors along likely interior travel paths.
How can I reduce false alarms in my security system?
Enable verified response and visual confirmation features, and regularly test sensors to ensure triggers are accurate and genuine. Verified response protocols allow monitoring centers to confirm legitimacy before contacting police, significantly reducing unnecessary dispatch.
What maintenance is required for a reliable security system?
Test alarms every month, replace system batteries on schedule, update firmware regularly, and review access-sharing policies for privacy and security. A structured maintenance cadence also includes quarterly cellular failover verification and annual physical inspections of all hardware.
Recommended
- Home security setup workflow for maximum protection – Safes and Security Direct
- Home security best practices: protect property in 2026 – Safes and Security Direct
- How to Secure Commercial Premises for Maximum Protection – Safes and Security Direct
- How to Maintain Security Systems for Reliable Protection – Safes and Security Direct