

DIY Home Surveillance Guide for Homeowners in 2026
TL;DR:
- A DIY home surveillance system allows homeowners to control security hardware without professional installation or ongoing fees, saving costs. Proper equipment selection, strategic camera placement, network setup, and maintenance are essential for effective, reliable coverage. Building gradually and preparing your network upfront ensures a functional, scalable, and affordable system tailored to your needs.
A DIY home surveillance system is a self-installed network of cameras, recorders, and sensors that gives you direct control over your property’s security without paying for professional installation or ongoing monitoring contracts. This diy home surveillance guide covers everything from picking the right cameras to configuring motion alerts, so you can build a system that fits your budget and your floor plan. Modern options range from plug-and-play commercial kits to fully custom Raspberry Pi setups, meaning renters and homeowners alike can find a solution that works. The core advantage is cost: you own the hardware, you control the footage, and you skip the monthly fees that add up fast.
What does a DIY home surveillance guide actually cover?
The term “DIY surveillance” covers a broad spectrum, and the industry standard phrase is closed-circuit television (CCTV) or IP camera system. Both terms appear throughout product listings and installation manuals, so knowing them helps when you shop. A complete home security setup guide addresses four areas: equipment selection, camera placement, network configuration, and ongoing maintenance. Skip any one of those, and you will have gaps in your coverage or a system that goes offline at the worst moment.
The best DIY surveillance systems share three traits. They use cameras with at least 1080p resolution for usable footage. They store recordings locally or in a hybrid local-plus-cloud setup. They send motion alerts to your phone without requiring a paid subscription. A Raspberry Pi-based system can be built for under $150 with zero ongoing fees, compared to commercial cloud subscriptions that run $15 to $40 per month. That difference compounds to $180 to $480 per year, which buys you two or three additional cameras instead.
What equipment do you need for a home security camera setup?
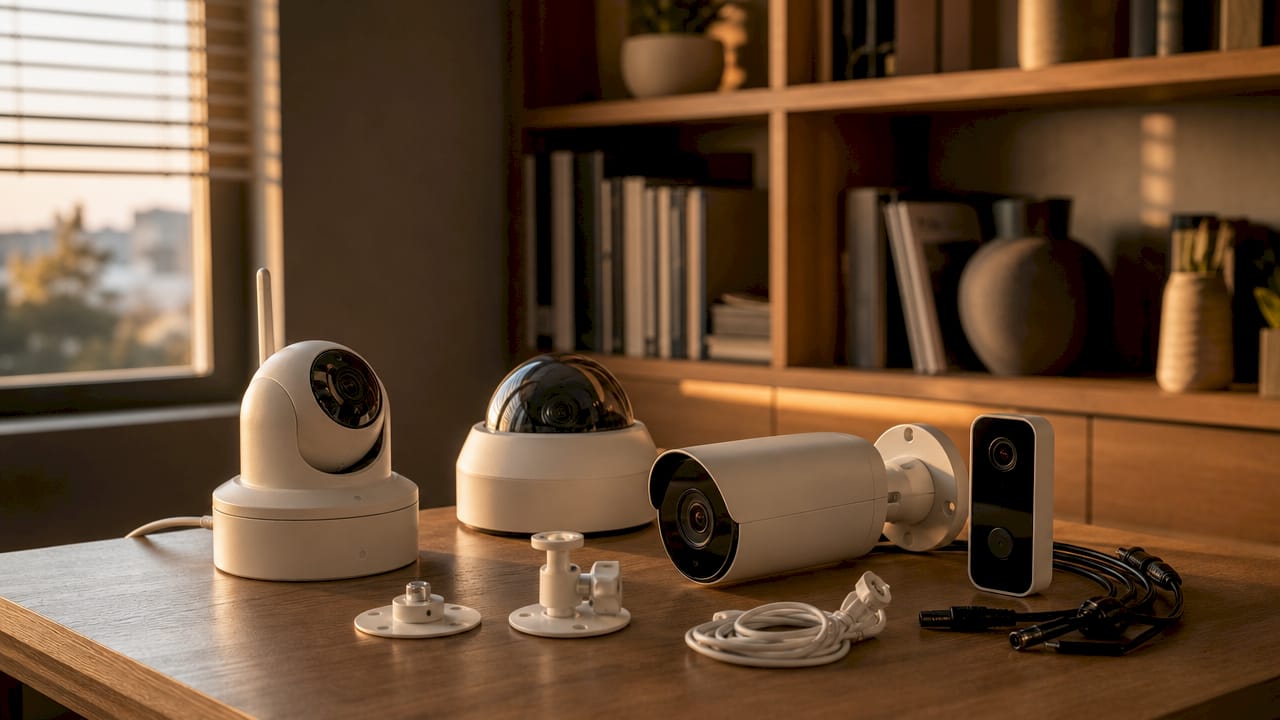
Camera types and their trade-offs
Four camera types dominate the DIY market. Wired IP cameras deliver the most reliable connection and the best image quality, but they require running Ethernet cable through walls or along baseboards. Wireless Wi-Fi cameras are faster to install and work well for renters who cannot drill through walls, but they depend on a strong signal and a stable router. USB cameras work for indoor desktop monitoring but lack the weatherproofing needed for exterior use. PoE (Power over Ethernet) cameras combine wired reliability with a single cable for both power and data, making them the preferred choice for permanent installations.
Key specs to prioritize
| Feature | Minimum Spec | Recommended Spec |
|---|---|---|
| Resolution | 1080p (1920x1080) | 2K or 4K for entry points |
| Night vision | 20 ft infrared | 40 ft color night vision |
| Field of view | 90 degrees | 110 to 130 degrees |
| Storage | MicroSD card | NVR with 1 TB HDD |
| Power | Battery or USB | PoE or hardwired AC |
Beyond the camera itself, you need a router capable of DHCP reservations, mounting hardware rated for outdoor use, and either a Network Video Recorder (NVR) or a local server for storing footage. NVR units from brands like Reolink and Hikvision bundle recording and camera management into one device, which simplifies setup for beginners.
Pro Tip: Buy cameras from a single manufacturer for your first build. Mixing brands forces you to juggle multiple apps and incompatible recording formats, which creates more problems than it solves.
Where should you mount cameras for maximum coverage?
Prioritizing entry points first
Start with the front door, driveway, and garage before adding cameras elsewhere. These three locations account for the majority of break-in attempts and package theft. Side gates and back doors are the next priority. Ground-floor windows matter more than upper floors for most single-family homes.
Optimal mounting height is 8 to 10 feet above the ground, with the camera angled slightly downward. This height captures facial features and body details clearly while keeping the camera out of easy reach. Mounting too high, above 12 feet, reduces facial recognition quality and makes the footage less useful for identification. Mounting too low puts the camera within reach of tampering.
Common placement mistakes to avoid
- Pointing cameras directly at a light source, such as a street lamp or the sun, washes out the image
- Placing cameras where tree branches or shrubs block the field of view during wind
- Ignoring the camera’s field of view spec and assuming one camera covers a wide corner
- Skipping a test recording before finalizing the mount position
Test both daytime and nighttime angles before you drill the final screws. Night vision performance often differs from daytime coverage because infrared illuminators have a narrower effective range than the camera’s optical lens. Configure motion detection zones after mounting to filter out traffic, swaying trees, and neighbors’ yards. Narrowing the zone to your property line alone cuts false alerts by a significant margin.
For more on camera placement strategy, the Safesandsecuritydirect blog covers specific angles for common home layouts.
How to install DIY cameras step by step
Preparing your network
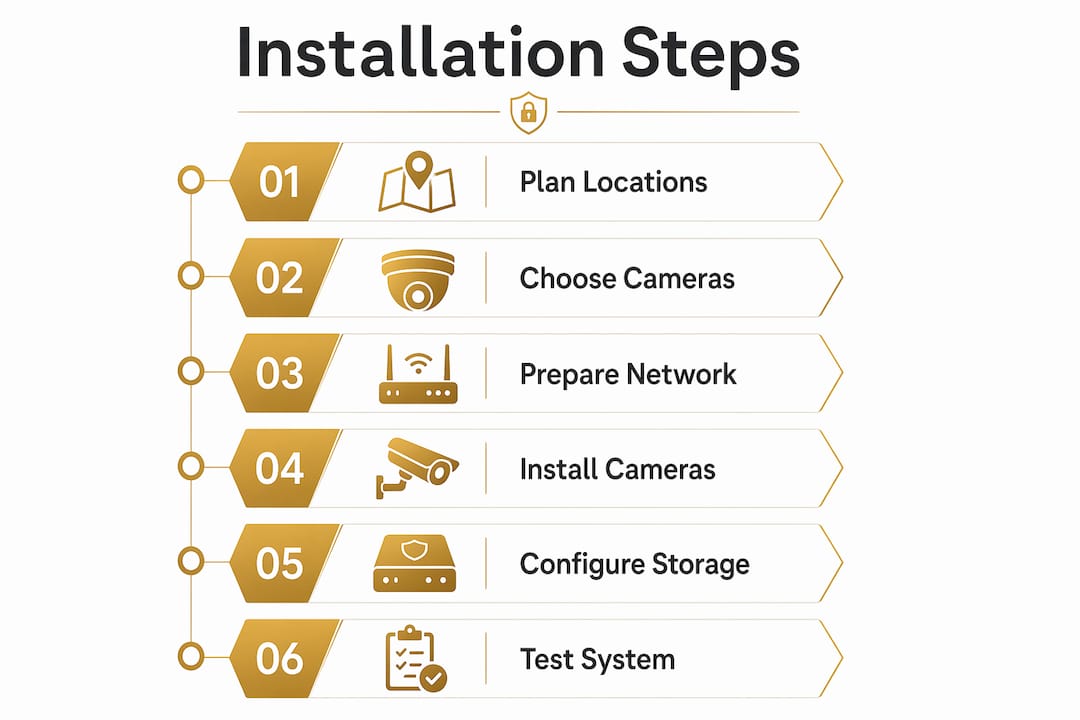
Before you unbox a single camera, log into your router and set up DHCP reservations for each device. DHCP reservations keep IP addresses stable, which prevents cameras from dropping off your NVR after a router restart. Assign each camera a fixed local IP address based on its MAC address. This takes five minutes per device and saves hours of troubleshooting later. Use a dedicated 2.4 GHz or 5 GHz network band for your cameras, separate from your main home network, to reduce interference and improve security.
Step-by-step installation process
- Mount the camera bracket at the chosen location and run your cable (Ethernet for wired, or confirm Wi-Fi signal strength for wireless).
- Connect the camera to power and your network, then open the manufacturer’s app on your phone.
- Pair the camera using the in-app QR code wizard. Most setups complete in under 15 minutes using this method.
- Assign the camera a name that matches its location (e.g., “Front Door,” “Driveway Left”) for easy identification in recordings.
- Configure your recording mode: choose continuous recording, motion-triggered recording, or a scheduled window depending on your storage capacity.
- Set up local storage via microSD card or NVR, and optionally enable cloud backup for critical cameras.
- Define motion detection zones within the app to limit alerts to your property.
- Enable push notifications and test them by walking through the camera’s field of view.
- Review the first 24 hours of footage to confirm angles, night vision quality, and alert accuracy.
Choosing local storage versus cloud
Local storage via an NVR or microSD card has no monthly cost and keeps your footage private. Cloud storage adds redundancy in case someone steals or destroys the camera, but it introduces a subscription fee and a dependency on your internet connection. A hybrid approach, where critical cameras back up to the cloud and secondary cameras store locally, balances cost and reliability for most households.
Advanced tips for maintaining and expanding your system
Network and performance hygiene
A single smart home ecosystem produces more reliable automations than mixing platforms. Choosing Amazon Alexa, Google Home, or Apple Home as your primary platform and buying compatible devices avoids the frustration of cameras that cannot trigger smart locks or lights. Matter and Thread are the current cross-platform standards worth watching, as more manufacturers are adopting them in 2026 devices.
For users running Frigate NVR with Home Assistant, reducing resolution to 1280x720 for AI object detection cuts CPU usage by roughly 60% without reducing detection accuracy. Pair that with running detection at 5 fps while recording at 15 fps, and you get accurate motion tracking with far less processing load. Full 30 fps recording is unnecessary for surveillance and wastes storage.
Security and maintenance checklist
- Change default camera passwords immediately after setup. Factory credentials are publicly documented and exploited routinely.
- Update camera firmware every 90 days. Manufacturers patch vulnerabilities that attackers actively target.
- Keep cameras on a separate network VLAN or guest network to limit exposure if one device is compromised.
- For battery-powered cameras, check charge levels monthly and clean the lens with a microfiber cloth to maintain image quality.
- Expand your system in stages. Adding two cameras at a time lets you verify network stability before scaling further.
Pro Tip: Use a free local push notification service like ntfy to receive motion alerts from a Raspberry Pi system without any cloud dependency or subscription cost.
You can also reinforce physical security alongside your camera system. Security fencing from a professional installer creates a physical deterrent that cameras alone cannot provide, and the two layers work together more effectively than either does alone.
Key takeaways
A well-planned DIY surveillance system built on stable networking, correct camera placement, and local storage delivers reliable home security without recurring monthly fees.
| Point | Details |
|---|---|
| Start with entry points | Cover the front door, driveway, and garage before adding secondary cameras. |
| Mount at 8 to 10 feet | This height captures facial detail and keeps cameras out of easy reach. |
| Use DHCP reservations | Fixed IP addresses prevent cameras from dropping off your recorder after restarts. |
| Choose one ecosystem | Sticking to Alexa, Google Home, or Apple Home reduces compatibility failures. |
| Optimize for AI detection | Running detection at 5 fps and 720p resolution cuts CPU load without losing accuracy. |
Why I think most people overcomplicate this from the start
People read about Frigate NVR, Home Assistant, and Raspberry Pi in the same afternoon and immediately try to build all of it at once. I have seen that approach fail more times than I can count. The system goes live, something breaks, and the homeowner has no idea which of the five new components caused the problem. The result is a camera system that sits offline for weeks because troubleshooting feels too overwhelming.
The smarter path is boring but it works. Buy two cameras. Mount them at your front door and driveway. Get them recording and sending alerts reliably. Live with that for a month. Then add two more. By the time you have six cameras running, you will have solved every network quirk specific to your home, and you will know exactly what your router can handle.
The other mistake I see constantly is skipping the network preparation step. People plug in cameras, assign them dynamic IPs, and then wonder why the NVR loses a camera every time the router reboots. Five minutes of DHCP reservation setup at the start prevents that entirely. For a deeper look at beginner surveillance setup, the Safesandsecuritydirect resource covers the foundational steps clearly.
The honest truth about DIY surveillance is that the effort is front-loaded. Once your system is configured correctly, it runs with almost no intervention. The savings over a professionally monitored system with monthly fees are real, and the control you have over your own footage is something no subscription service gives you.
— Chetna
Build your system with the right equipment from Safesandsecuritydirect
Safesandsecuritydirect stocks a curated range of IP cameras, NVR units, and mounting hardware selected for compatibility and reliability across DIY installations. Whether you are setting up your first two-camera system or expanding an existing network, the product catalog includes options at multiple price points with full specifications listed. The Safesandsecuritydirect blog publishes practical guides on camera selection, placement, and system maintenance written specifically for homeowners and renters. Browse the full security camera range to find equipment that matches your layout, budget, and technical comfort level, with customer support available to help you choose the right setup.
FAQ
What is the cheapest way to build a DIY home surveillance system?
A Raspberry Pi-based system costs under $150 to build and carries zero monthly fees, compared to commercial subscriptions that run $15 to $40 per month. This makes it the most cost-effective option for technically comfortable homeowners.
How high should I mount security cameras?
Mount cameras between 8 and 10 feet above the ground with a slight downward angle. This height captures clear facial and body detail while keeping the camera out of reach.
Do I need cloud storage for a DIY camera system?
No. Local storage via an NVR or microSD card stores footage with no ongoing cost and keeps your recordings private. Cloud backup is optional and useful only as a secondary layer for critical cameras.
How do I stop getting too many false motion alerts?
Configure motion detection zones within your camera app to cover only your property, not the street or a neighbor’s yard. Running AI object detection at 5 fps also filters out non-human movement like animals and blowing leaves.
Can renters install a DIY security camera system?
Yes. Wireless Wi-Fi cameras require no drilling and can be removed without leaving damage, making them well-suited for rental properties. Battery-powered models from brands like Arlo and Eufy are specifically designed for no-drill installation.
Recommended
- How to Improve Home Security: Proven Steps for 2026 – Safes and Security Direct
- What is home security? A 2026 homeowner’s guide – Safes and Security Direct
- Home security best practices: protect property in 2026 – Safes and Security Direct
- Surveillance technology trends 2026: What you need to know – Safes and Security Direct